But still interested in feeding yourself? What if I told you that there’s a woman with a blog who had to feed both herself and her young son…on 10 British pounds ($15/14 Euro) per week?
Let me tell you a thing.
This woman saved my life last year. Actually saved my life. I had a piggy bank full of change and that’s it. Many people in my fandom might remember that dark time as when I had to hock my writing skills in exchange for donations. I cried a lot then.
This is real talk, people: I marked down exactly what I needed to buy, totaled it, counted out that exact change, and then went to three different stores to buy what I needed so I didn’t have to dump a load of change on just one person. I was already embarrassed, but to feel people staring? Utter shame suffused me. The reasons behind that are another post all together.
AgirlcalledJack.com is run by a British woman who was on benefits for years. Things got desperate. She had to find a way to feed herself and her son using just the basics that could be found at the supermarket. But the recipes she came up with are amazing.
You have to consider the differing costs of things between countries, but if you just have three ingredients in your cupboard, this woman will tell you what to do with it. Check what you already have. Chances are you have the basics of a filling meal already.
Bake your own bread. It’s easier than you think. Here’s a list of many recipes, each using some variation of just plain flour, yeast, some oil, maybe water or lemon juice. And kneading bread is therapeutic.
She has a book, but many recipes can be found on her blog for free. She prices her recipes down to the cent, and every year she participates in a project called “Living Below the Line” where she has to live on 1 BP per day of food for five days.
Things improved for me a little, but her website is my go to. I learned how to bake bread (using my crockpot, but that was my own twist), and I have a little cart full of things that saved me back then, just in case I need them again. She gives you the tools to feed yourself, for very little money, and that’s a fabulous feeling.
Tip: Whenever you have a little extra money, buy a 10 dollar/pound/euro giftcard from your discount grocer. Stash it. That’s your super emergency money. Make sure they don’t charge by the month for lack of use, though.
I don’t care if it sounds like an advertisement–you won’t be buying anything from the site. What I DO care about is your mental, emotional, and physical health–and dammit, food’s right in the center of that.
If you don’t need this now, pass it on to someone who does. Pass it on anyway, because do you REALLY know which of the people in your life is in need? Which follower might be staring at their own piggy bank? Trust me: someone out there needs to see this.
❤
She’s amazing. She even argues with UK politicians
This will likely end up being really important to me
There is a similar project by Leanne Brown, who did it for US SNAP recipients. Includes a free PDF cookbook that was her MA project.
This is もちアイス (mochiaisu) and the “soft skin” is pounded rice cake. The white stuff you see on the outside is powdered sugar so they won’t get sticky. It’s very delicious on a hot day and you can get these at the right self-serve frozen yogurt joints. Unfortunately North America sells one mochiaisu for a dollar and some cents whereas in Japan you can get these by the boxful in any supermarket.
Want it. Nnh
you can make it yourself at home folks! Mochi is really simple to make, all you have to do is take 2 cups rice flower, mix with 1 cup water and ½ cup sugar, boil it in a pot or put in a ceranwrap covered bowl and put in microwave for 7 minutes. turn off the heat and stir it until it becomes solid and sticky. Then you can roll it into balls with a little bit of rice flour on top to keep it from being too sticky. Then you can eat it just like that, cover a scoop of ice cream and freeze it to make this, or you can make Strawberry Daifuku which is strawberries and red bean paste (anko) wrapped in mochi. I make it all the time!
Aww damn i gotta do this!!
Waaaaant. You’d find them in regular supermarkets in Seattle. Out here? Not so much. 😦
reblogging this because MOCHI RECIPE
a video recipe, for visual help; also a dog
Always reblog Cooking With Dog.
I will never not reblog these because they are good as fuck
there’s an asian supermarket close by to where I live and I raid the mochi section every chance I get
I made chocolate-orange hot chocolate tonight and it was SO GOOD. And it has TWO INGREDIENTS (or three, depending on how thick you like your chocolate) and not very many steps. YAY!
INGREDIENTS:
*chocolate orange, or other tasty eating chocolate.
*heavy cream
*milk (optional)
EQUIPMENT:
*small saucepan
*stirring implement of some kind (i prefer a wire whisk)
*mug
INSTRUCTIONS:
1) Acquire chocolate orange. If you do not have/do not like chocolate oranges, other eating chocolate will do, although the higher quality the better. When not using chocolate oranges i usually use those little Dove Promises guys.
2) Acquire small saucepan. Larger saucepans (and more chocolate) are helpful if you’re making chocolate for more than one person.
3) spread the chocolate across the bottom of the pan.
This is about a quarter of a chocolate orange Please ignore how dirty my stove is. Note that I didn’t spread it all that carefully, figuring that the chocolate would melt pretty quickly (it did).
4) Turn the burner on AS LOW AS POSSIBLE. Chocolate burns easily, but it ought to behave itself if you turn the stove on as low as you can get it and pay attention to the pot.
here you see the mostly-melted chocolate. I whisked it a little to encourage the last bits to melt.
5) Once the chocolate is mostly melted, dribble in some cream.
Notice that the chocolate clumped up a bit and didn’t want to mix in (especially near the edges). Fear not! This is just a thing chocolate does sometimes. Keep stirring and it will incorporate.
Keep stirring….
THERE we go.
6) Keep adding cream by dribbles and mixing it in until the chocolate doesn’t do the clumpy thing anymore. This will probably take four or five sets of dribbles-and-stirring.
7) Taste the chocolate. You might, as i did, decide that you added an insufficient amount of chocolate – go ahead and put in some more if you want.
(yes, i put in most of the rest of the orange. shush.) Stir until it has melted all the way in.
8) add a little more cream if you want, depending on how thick you like your drinking chocolate. If you like it thick enough to stand a spoon in, you’re probably done. Otherwise, add a bit more cream.
9) If this concoction is just too rich for you (and it is pretty damn rich) or if you want to stretch it without using up your ENTIRE stash of heavy cream (which is expensive), now is the time to add some milk. Just pour it in and stir.
10) Continue to heat on ULTRA MEGA LOW until you have reached the desired temperature. (because chocolate has such a low melting point, it will probably happen that the top of the chocolate is just lukewarm even though the chocolate has all melted in.) Keep an eye on it though, so it doesn’t burn or develop a skin from getting too hot.
11) Pour into a mug. If you want, deglaze the pan with more milk (pour milk in to cover up all the chocolate sticking to the sides and bottom of the pan, heat GENTLY and stir to get the chocolate off the pot and into the milk) to get a much-more-diluted-but-still-tasty drink. Why waste chocolate, right?
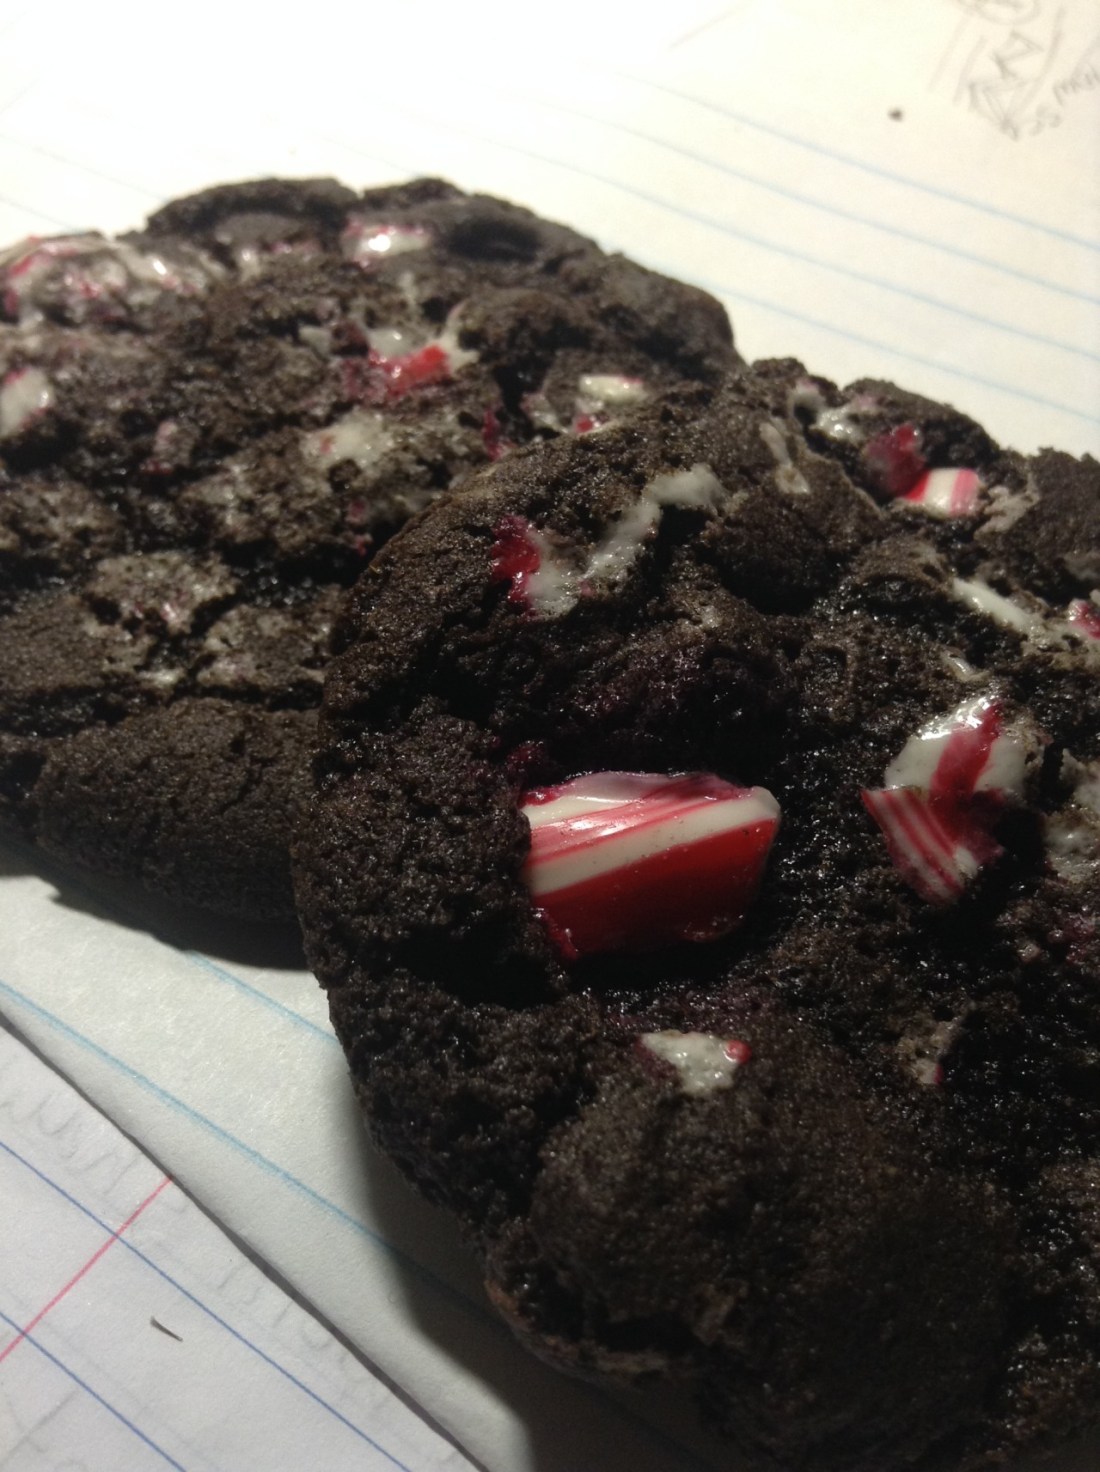
i made these this evening (December 6th, that is) and i’ll see how long they last in the house full of cookie-eaters. 🙂
slightly modified the recipe and used crushed candy canes instead of the peppermint M&Ms. and i also used white chocolate chips in the first batch and switched the vanilla extract for mint extract for extra minty-ness in the second batch.
Okay so I made these without the cinnamon and nutmeg and lemme just tell you:
THESE MUFFINS TASTE EXACTLY LIKE DOUGHNUTS.
I DUNNO WHAT KIND OF VOODOO I PULLED IN THE KITCHEN BUT SLAP MY NIPPLES AND CALL ME BETSY BECAUSE THEY TASTE LIKE DOUGHNUTS HALLELUJAH IN THE HIGHEST.
i made these today! they’re DELIGHTFUL! (i made them with the cinnamon and nutmeg, but now i’m planning on trying them without and maybe filling the middle with some kind of jelly???? we shall see.)
slap my nipples and call me betsy
OH HEY it’s the french breakfast puffs recipe I use as a base for the gf version I am trying to perfect.
Spray an oven proof pan – 9X11 or 13 pyrex or something like that with Pam
½ lb wide noodles (cook apx 12 minutes at full boil)
3 eggs beaten
In separate bowl combine
½ lb cottage cheese
½ stick melted butter (I use unsalted – either would work)
½ cup sugar
1 cup sour cream (small container)
½ teasp. cinnamon
½ cup raisins
1 apple cored, peeled and sliced thin
pinch salt
½ teasp. vanilla
Mix the above together and then mix in noodles.
Fold in beaten eggs.
Bake in greased pan apx 1 hour at 350 uncovered.
Check after 20
minutes if the noodles are browning too fast put some foil over the top.
-end c/p-
Granny Smith is what I’d use for the apple, but whatever you’d use in a pie or for a baked apple would work. This makes really good leftovers and is tasty hot or cold – leftover kugel is a great quick breakfast!
I’ve never made a kugel. But this one…oh, it’s hitting all my tasty buttons.